|
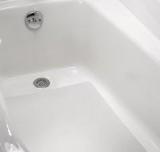
Porcelain Tub Restoration The left rear corner of this tub was purposely left un-done to show that the finished tub is the same one we started with.
|
|
1 STEP-1 - B
THE TUB MUST BE THOROUGHLY CLEANED AGAIN JUST AS IN STEP 1A
STEP 1B The second cleaning of the tub surface (Insures an absolutely clean surface, free of all STAINS & impurities)
CLOSE DRAIN OUTLET TO PREVENT LOSS OF CLEANING COMPOUNDS CLOSE DRAIN OUTLET TO PREVENT LOSS OF CLEANING COMPOUNDS
4
APPLY STEP-1 CLEANING PRODUCTS
Ad 4 oz diluted Step-1 to bottom of tub. Sprinkle on 1/2 oz Step-1 Booster and 1/2 oz Super-Scower. Scrubbing tub with black scrub pad held with EZ Grip handle. Start at bottom of tub and work up back wall, ends and top of tub. Clean inside front and apron of tub last to prevent getting product on your arms.
Apply Products to Tub Bottom Step-1 Booster, Super-Scower and Diluted Step-1 (3 to 1) CLEAN TUB WITH EZ HANDLE, BLACK or BROWN PAD
5 "OPTIONAL" CLEAN TUB "BOTTOM" "STAIN-BLASTER™" & BLACK or BROWN PAD
7 CLEAN TUB SIDE WALLS, TOP AND FRONT WITH APPROPRIATE PAD AND EZ GRIP HANDLE
8 RINSE TUB RINSE TUB THOROUGHLY
9 DRY TUB Use Star Fiber Towel and Fan to DRY Tub Thoroughly 10
COMPLETE DRYING TUB WITH FAN OVER TUB RUN FAN UNTIL TUB IS COMPLETELY DRY 11 AFTER TUB IS THOROUGHLY DRY
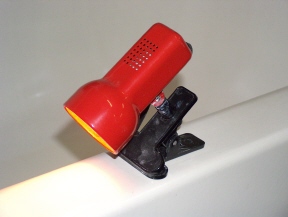
INSPECT with the T- 5 Detection Light to determine the dull and glossy areas of the tub
T-5 FINDS DULL AREAS OF TUB
We only treat the DULL WORN areas of the tub bringing them back to the same high gloss of the non-worn areas
Turn off ALL other lights in room to make the inspection for best results!
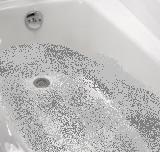
Most tubs are dull ONLY in the bottom and approximately 1/3 up the side walls as shown with the RED arrows above.
Some tubs are NOT worn at all and may have only a few chips. Some tubs are dull all over especially if they have been refinished previously and etched with hydrofluoric acid
We want to repair damaged areas, and restore the gloss to worn areas bringing the tub back to its original appearance.
AFTER MAKING A THOROUGH INSPECTION PROCEED to Chip Repairs if needed or Slip-Grip if desired or to STEP-2
© SPR Product Sales 2012 |