|
CHIP REPAIR
|
|
Allow time for videos to download before viewing, review written instructions while waiting for videos 1 CHIP REPAIRS WHEN RESTORING A TUB
1.Sand chipped area 2.Mix filler & color 3.Add hardener 4.Fill chip 5.Harden filler 6.Sand smooth Chips require filling, sanding, then applying a second thin coat of filler to get a virtually perfect repair
9. SEE # 9 on instruction sheet
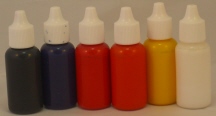
See color chart in written instructions
Tints are Super concentrated use minute amounts of tint in filler Apply tiny amounts with tip end of a straightened, paper clip to get right amount and color
2 CHIP REPAIRS SURFACE PREP
3 CHIP REPAIR FILLER (MIXING) White & Pastel Colors
Use KF-40 White Filler IMPORTANT: Use minute amounts of tints for fine tuning filler color
4 CHIP REPAIR FILLER (MIXING) Deep Colors
Use KF-41 Neutral Color, Filler IMPORTANT: Use no more that 10% tints for deep colors
5 AREA BEING REPAIRED MUST BE HEATED WITH HEAT GUN PRIOR TO APPLYING FILLER
Heating surface removes moisture and starts hardening filler from the back side of the repair. PORCELAIN SURFACES: Touch heated area with (back side) of hand. When areas is uncomfortable warm to touch but NOT to hot to touch then apply catalyzed filler. FIBERGLASS SURFACES: Use less heat on fiberglass it burns easily. ACRYLIC SURFACES: WARNING Use only KF-47 Acrylic Filler and do NOT use any heat on acrylic surfaces. If heated the filler will crack around the edges when it cools.
6 CHIP REPAIR FILLER APPLICATION
7 FILLED AREA REQUIRES HEATING WITH HEAT GUN FILLER MUST BE HARD BEFORE SANDING
With a metal object like a screw driver etc, tap on tub beside filler then tap on filler. When both filler and tub sound the same the filler is hard and ready to sand.
8 SANDING CHIP FILLER TO CONTOUR
Use 100 - 120 grit paper and small rubber sanding block
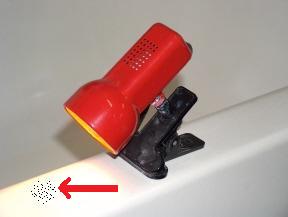
9 CHIP REPAIR IS A TWO STEP PROCESS T-1 DETECTOR LIGHT
Turn off overhead lights and use T-1 Detector Light to detect imperfections in filled chip AFTER sanding. Apply a second coat of filler and sand for a perfect repair. Follow written Instructions closely 10 EACH CHIP MUST BE FILLED AND SANDED TWICE (2) Times TO GET A PERFECTLY SMOOTH SURFACE
11
CHIP FILLER REQUIRES HEATING FILLED AREA WITH HEAT GUN FILLER MUST BE HARD BEFORE SANDING
12 SANDING CHIP FILLER "FINAL SANDING"
13 TACK CLOTH DUST REMOVAL
Dust removal is essential
14 2-W COLOR BLENDING CHIP REPAIRS
Choose correct color 2-W blender Different color 2-W can be placed on applicator pad to adjust color of repair Apply 2-W to repaired area with applicator pad in a dabbing and wiping motion alternately
15
CHIP REPAIR, FINAL TREATMENT WHEN USING 2-W
16 FINISHED REPAIR
AFTER ALL REPAIRS ARE COMPLETED PROCEED TO Slip-Grip or STEP-2 © SPR International Inc. 2012 |