-
IMPORTANT:
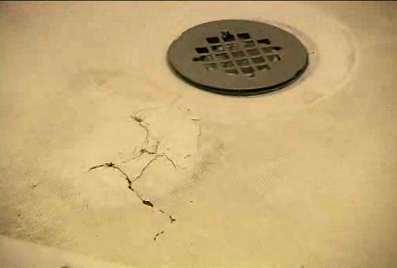
If there is water in a crack or hole use wet dry vacuum to
remove all water, Drill holes in tub bottom within the repair
area (if necessary) then vacuum water out.
-
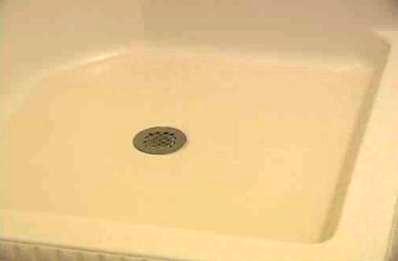
Use
masking tape to outline the area of the tub or shower bottom
that will be covered with the Slip-Grip coating.
-
The Slip-Grip should go as close to
the curve of the side walls as possible.
-
Use 80 grit
sandpaper to scuff up the tub bottom within the taped area
(only), Vacuum thoroughly and wipe with KF-7.
-
Place a strip of
3/4" masking tape around the inside perimeter of the existing
tape, this keeps resin from getting to close to the edge.
-
If there is a
depression or low place in the bottom fill it with KF-43 filler
and sand level. Vacuum thoroughly.
-
Wipe the bottom
area thoroughly with KF-7 before any resin is applied.
-
Lay a strip of
cloth (thinner glass cloth material) one inch larger than the crack over the
crack before placing the large piece of matting on the bottom.
-
Lay the matting
(smaller size with thicker heavier fiberglass piece) in the
center of the prepared area. Fold the mat back one-half left to
right. 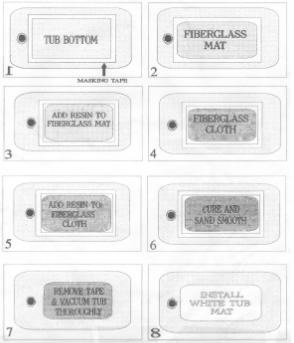
-
Ventilate
the room to remove fumes and vapors (Use e-z Vent System)
-
Mixing: Pour
HARDENER #2 into Low Odor RESIN BOTTLE #1 and shake thoroughly, Pour 1/4
of the resin in the middle of the exposed area where you have
folded the mat back, Distribute the resin over the area with a
bristle brush (in kit), (MOVE QUICKLY) then unfold the
mat back over the resin. Now fold the mat back the other way and
do the same thing to that side. Pour the remainder of the resin
over the glass matting.
-
MOVE QUICKLY.
Use the bristle brush to pat out the air bubbles that are
trapped in the fiber mat, You may also use a fiberglass roller. Make sure the mat is wet with resin.
Do not allow the resin to go beyond the taped area, Use acetone
and paper towels to clean up any mess immediately. Pat do not
brush over the glass with the brush to make it as smooth as
possible. All air bubbles must be removed. The resin looks clear
when air bubbles are gone.
-
Mix the next
batch of resin the same as the first and pour 1/2 of it over the
matting and smooth out with a brush. Now lay the fiberglass
cloth (the larger lighter weight fiberglass) over the already
wet matting and use the brush to pat out the air bubbles. Pour
the remainder over the cloth and spread with the bristle brush.
Keep the cloth as smooth as possible. Pat and brush the resin as
needed to create a smooth surface.
-
IMPORTANT: Clean
up all resin spills or drips while the material is still wet,
use acetone, KF-1. Clean all tools immediately after each use
with acetone.
-
YOU ONLY HAVE ONE CHANCE TO CLEAN UP. AFTER THAT
YOU REPLACE YOUR TOOLS AND REPAIR THE PLACES WHERE TILE RESIN IS
LEFT ON THE TUB, ETC.
-
Practice good
house keeping at all times.
-
DISPOSE OF EMPTY CONTAINERS PROPERLY
-
TO SPEED
HARDENING: The tub bottom can be heated with a heat gun or
infrared heater prior to and after applying the resin.
-
After hardening
remove the inside strip of tape and allow the tub to cool. SAND the entire
treated area within the taped area with 80 grit abrasive paper
to smooth any rough edges.
Vacuum and clean entire bottom with KF-7 cleaner, alcohol.
-
Repair any pits
or extremely areas with with KF-43.
-
Vacuum and wipe
thoroughly with reusable tack cloth.
-
Clean entire
bottom with KF-7.

 Soft
or Cracked Fiberglass Tub or Shower Bottoms
Soft
or Cracked Fiberglass Tub or Shower Bottoms